By Marc Venis B.A.Sc., M.A.Sc., P.Eng.
President Vencon Technologies Inc.
Standard Charging
In this article I discuss the two methods of NiCd and NiMH charging — standard and trickle. The “overnight” charger that comes with most rechargeable powered products charges at a rate of C/10 (the C rate is the hour capacity of the battery, i.e. a typical AA NiCd battery of 600mAh capacity has a C rate of 600mA, and a C/10 rate of 60mA). There is a very good reason why the manufacturer chose this rate. If the charger uses a higher rate, it would have to detect when the batteries are fully charged and shut off, or risk damaging them. This would make the charger more complex, and hence more expensive. Lower charge rates than C/10 unnecessarily extend the charging time, and in fact at very low rates (below C/50) the batteries never fully charge no matter how long you wait.
Thus the C/10 charging rate is a compromise between keeping the charger simple, yet charging the batteries in an acceptable amount of time. At the C/10 rate the battery will reach a full charge after approximately 14 to 16 hours. If the actual battery capacity was the same as its rated value, and its charging efficiency was 100% then only 10 hours would be necessary to fully charge a battery. But, actual capacity is usually greater than rated and charging efficiency is always less than 100%, thus 14 to 16 hours of C/10 charging ensures a fully charged battery. At this point any further charging only results in an increase in temperature and internal cell pressure. This does not damage the battery, although it accelerates their deterioration thus reduces their reliability.
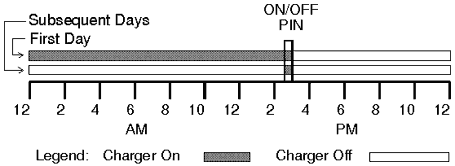
Now that we know what the standard charger is, how do we use it? Most important, follow the manufacturer’s instructions. A typical manufacturer recommends a 15 hour charge to fully charge a discharged battery. If your battery is only partially discharged, your can prorate the charge time. For instance, a battery that is one third discharged will fully charge in only 5 hours. If you don’t know the condition of your battery, then you should charge it for the full 15 hours. What happens if you forget to disconnect the charger and end up charging for more than the required amount? If you overcharge by only a few hours, don’t worry. If you leave your charger connected for a couple of days, then you’re unduly stressing your batteries. If you’re the forgetful or worrying type, then you might want to use a timer. I like to use the standard 24 hour security timer, used to switch lights on and off when you’re away. It is sold almost anywhere, usually less than $10 on sale. To use a timer with removable ON/OFF pins for standard charging, first rotate the time dial until 12 midnight. Now insert an OFF pin at the 3pm position (15 hours) and remove any remaining pins (figure 1). Now plug your charger into the timer and the timer into a wall socket. Rotate the on/off switch on the timer until your charger turns on, and leave it alone. After 15 hours your charger will shut off and remain so. If you have a timer without removable pins set it up as above, but instead of inserting an OFF pin at 3pm, set an ON/OFF pin (or if separate pins, the ON and OFF pins together) at 2:30pm such that the timer will turn on at 2:30pm and off at 3pm (figure 2). It will operate similar to a single cycle timer, except on subsequent days the charger will turn on for one half hour each day (actually an advantage as we’ll see later).
Figure 1.
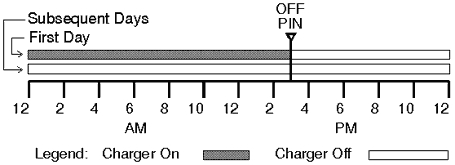
Figure 2.
Trickle Charging
I’m calling this section “Trickle Charging” because that’s the term we are all familiar with. This section is really about keeping your batteries fully charged. Trickle charging is one way to do that, charge replacement the other. To avoid confusion, I’ll use the term “trickle charging” to refer to any method of keeping your batteries fully charged.
Now that we know how to fully charge our batteries, when do we trickle charge? If you usually charge your batteries the day before you intend to use them, you don’t need to trickle charge. If, on the other hand, you’re like me and want to have all your batteries charged and ready to go, you need a trickle charging system.
NiCds and NiMH cells, like all batteries, self-discharge. NiCds and NiMH actually have a relatively high self-discharge rate of about 1% per day at room temperature (i.e. a 600mAh cell loses about 6mAh each day). The purpose of trickle charging is to replace the charge that is continually draining off.
Trickle charging is similar to standard charging (i.e. it uses a continuous charging current), only less current is used, between C/50 and C/20 (i.e. between 12mA and 30mA for a 600mAh cell). This rate is high enough to maintain a charged battery fully charged, yet low enough to permit continuous charging while keeping cell temperature and internal cell pressure at a safe level.
Since I doubt a trickle charger came with your battery, we will need to be a bit more inventive if we want to trickle charge our batteries (or you can go out and buy a commercial trickle charger). There are three basic methods used in our hobby to trickle charge.
Method 1. Continuous Current.
The simplest method of trickle charging (at least for a manufacturer) is to just reduce the charging current to about C/40. If the charger already charges at the standard C/10 rate, then all the manufacturer need do is add a resistor (and possibly a switch for trickle/standard mode and a charge indicator LED). This is the method used by most trickle chargers.
Method 2. Pulsed Current.
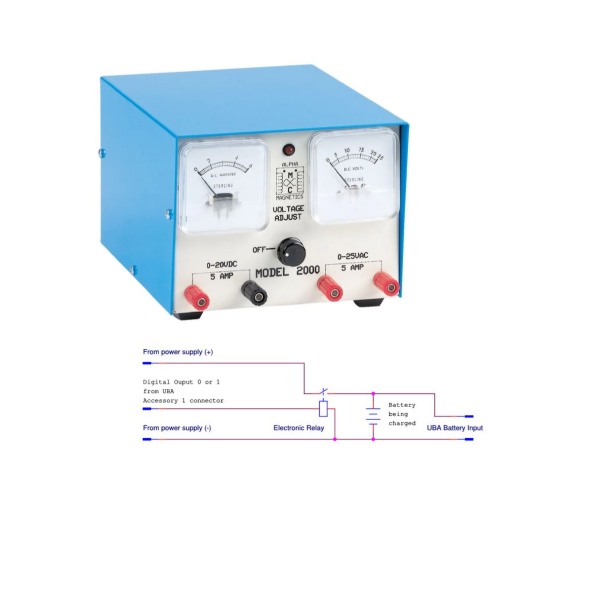
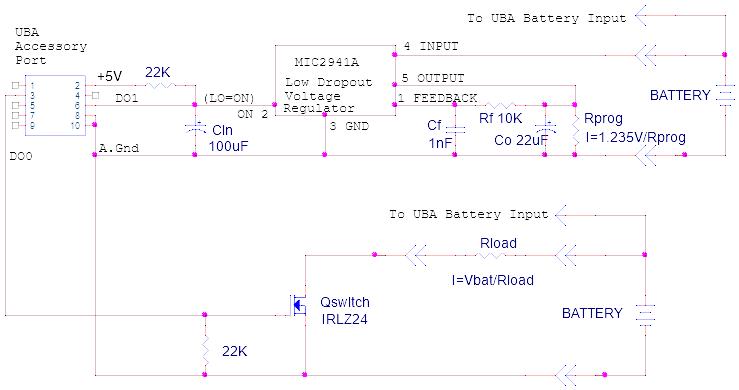
If we switch a C/10 standard charger on and off such that it is on for only 10% of the time, we would be continuously replacing any lost charge. We could do this by switching a C/10 charger on for one second off for nine seconds. This is similar to the method used by the Ultimate Battery Analyzer. This is more complicated for the manufacturer than the continuous current method, but easier for the user. If we switch the AC side of our standard chargers, we can simultaneously trickle charge all our batteries. Unfortunately the 24 hour security timer can’t switch on and off fast enough for this method, but it can do something else, as shown below.
Method 3. Daily Charge Replacement.
This method allows the battery to self-discharge during the day then it replaces the lost charge once per day. It is a simple and inexpensive method. Set the timer to turn on for at least one half hour each day. Plug your chargers into the timer (a power bar comes in handy here), and the timer into the AC socket. Everyday your batteries will get a top-up charge and will be ready for use.
What would happen if you accidentally connect a fully or partially discharged battery to your trickle charger? Method 1 has the advantage that it will charge the battery in about 3 days (although this isn’t recommended because the battery might not reach its maximum capacity, you should always charge at the C/10 rate). Methods 2 and 3 with their slower charging could take over a month. Increasing the duty cycle ‘on’ time of methods 2 and 3 will reduce the charging time, but at the expense of slightly greater heating. You can increase method 2’s duty cycle up to 25% (1 second on, 3 seconds off) with little adverse effects. At 25% duty cycle, full charge will take four times as long as at the C/10 rate (about 3 days). Increasing method 3’s duty cycle to 25% will warm the pack for 6 hours every day.
An important consideration of which method you choose is verifying that the packs are on trickle charge. Method 2 has the advantage that you can see the flashing charge lights and know that the system is working. Method 1 does not draw enough current from the charger to light its LEDs, thus unless you have installed additional charge LEDs it is impossible to tell if the battery is actually charging. Since method 3 only turns on the charger for one half hour each day it is difficult to verify its operation. Method 1 also has the disadvantage in that being a continuous charging system, it promotes cadmium migration. Cadmium migration is something we want to avoid, and pulse charging (methods 2 and 3) reduce the chances of it happening.
Which trickle charging system is best for you? Unless you have a convenient method of pulse charging, I recommend method 3 for its simplicity and economy (and that’s the method I use).
A Personal Charging System
Now let’s combine a standard and trickle charger to assemble your own charging system. You can use your security timer to charge your batteries, then automatically trickle charge them. Remember where a timer without removable pins was used to charge up you batteries. During the first day the batteries charge for 15 hours. On subsequent days the batteries charge an additional one half hour. This will keep them fully charged and ready for use. You can do the same using a single cycle timer. Just insert the ON pin one half hour before the OFF pin. You can now leave and forget about it.
If you know that you’re not going to be using your battery for more than a couple of months, take your batteries off your trickle charger and just remember to fully charge them before use. Also, even though your batteries are on trickle charge, you still need to do a full discharge test every month or so to ensure their condition. One final note of caution. The first couple of times using a new trickle charger system insure that the batteries are really fully charged before you use them. Ideally, you would measure their capacity at least a day before using them by a discharge test and then fully charge them.
I hope that this information instills in you a bit more knowledge about charging your batteries.

 Windows 10 Compatible
